Difference between revisions of "Guide:Mod Installation"
ChillGenXer (talk | contribs) |
ChillGenXer (talk | contribs) |
||
| Line 9: | Line 9: | ||
Browse through the available mods and find one you want to install. For the purpose of this walkthrough<br> | |||
we will use the developer's official '''Moa''' mod. On the mod's page, select '''Subscribe''' (these are free, there is no charge): | we will use the developer's official '''Moa''' mod. On the mod's page, select '''Subscribe''' (these are free, there is no charge): | ||
| Line 18: | Line 18: | ||
You will get a confirmation that you have subscribed to the mod: | |||
| Line 26: | Line 26: | ||
Relaunch the game. Click on the "Mods" button: | |||
| Line 34: | Line 34: | ||
From here you can verify that your mod was installed: | |||
| Line 41: | Line 41: | ||
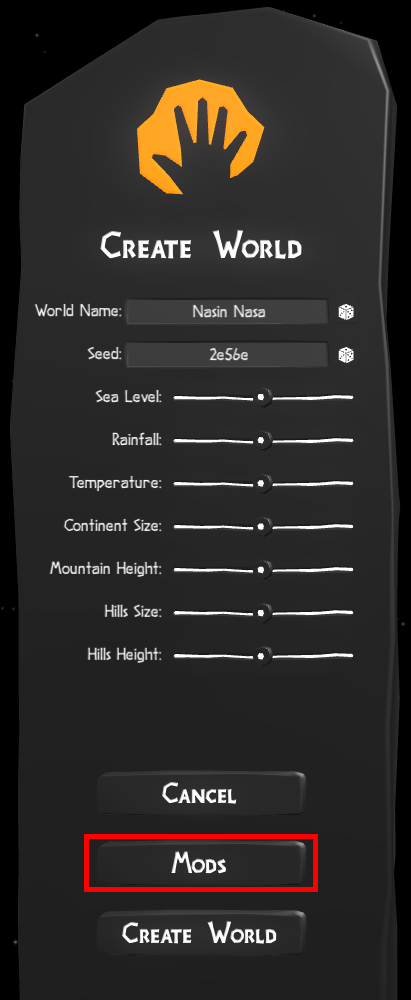
Over on the main menu, click '''Create World''': | |||
| Line 49: | Line 49: | ||
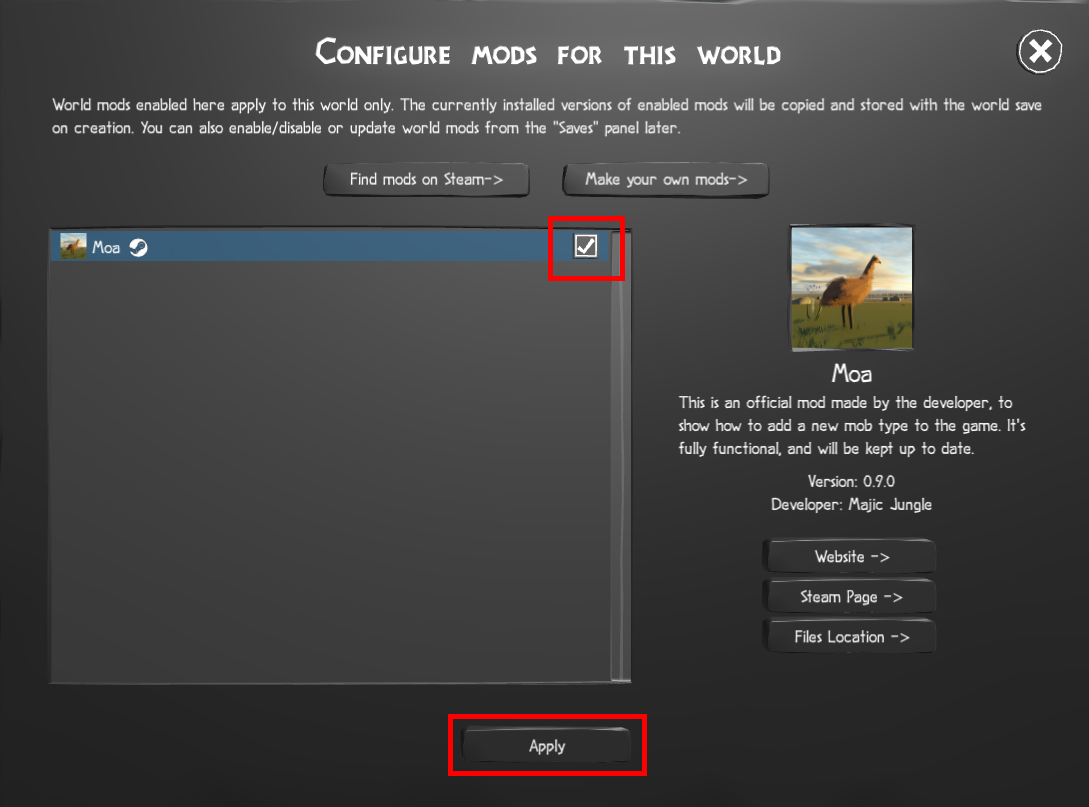
Now click "Mods". From here click the checkmark to enable the mod for this new world. | |||
| Line 57: | Line 57: | ||
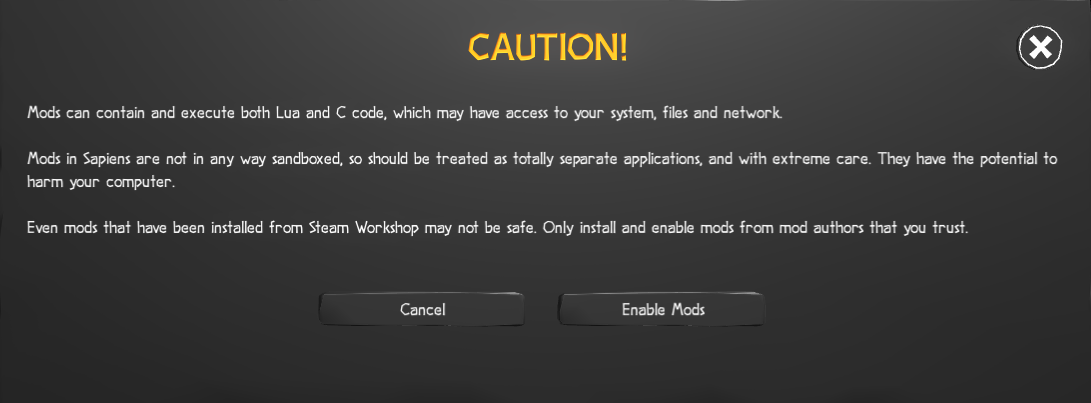
Understand the warning and proceed accordingly: | |||
| Line 65: | Line 65: | ||
That's it! Adjust what you want with the rest of the world settings as usual and click '''Create World'''. Your world will load up and the mod will be active. It's important to note''' when enabling new animals you may not see them right away. They will spawn at random just like the original animals - so you may play a while before seeing one. Give it time before thinking the mod isn't working. | |||
=Keeping Your Mods Up to Date= | =Keeping Your Mods Up to Date= | ||
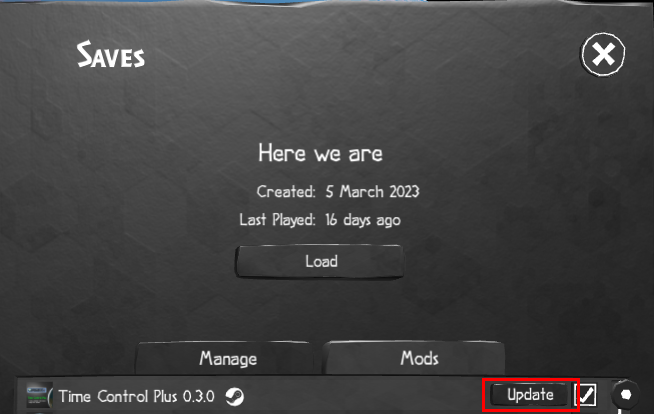
Occasionally mod creators will update their mods. While you will receive these updates automatically when you create a new world, mods applied to existing worlds will not update automatically. In this case, please check your worlds periodically (or when a developer has announced that a mod has updated) to see if any updates need to be applied: | |||
[[File:ModUpdateInSave.png|center]] | [[File:ModUpdateInSave.png|center]] | ||
Revision as of 13:05, 22 July 2023
How to install mods in Sapiens
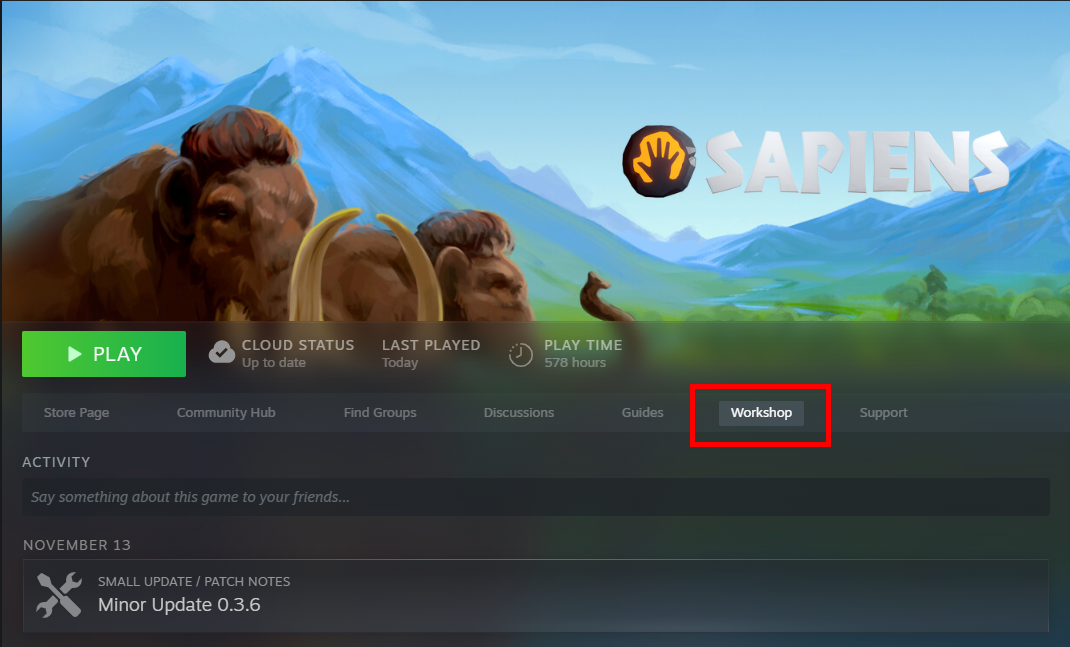
Start with Sapiens closed, and open the PC Steam page. From here, click "Workshop":
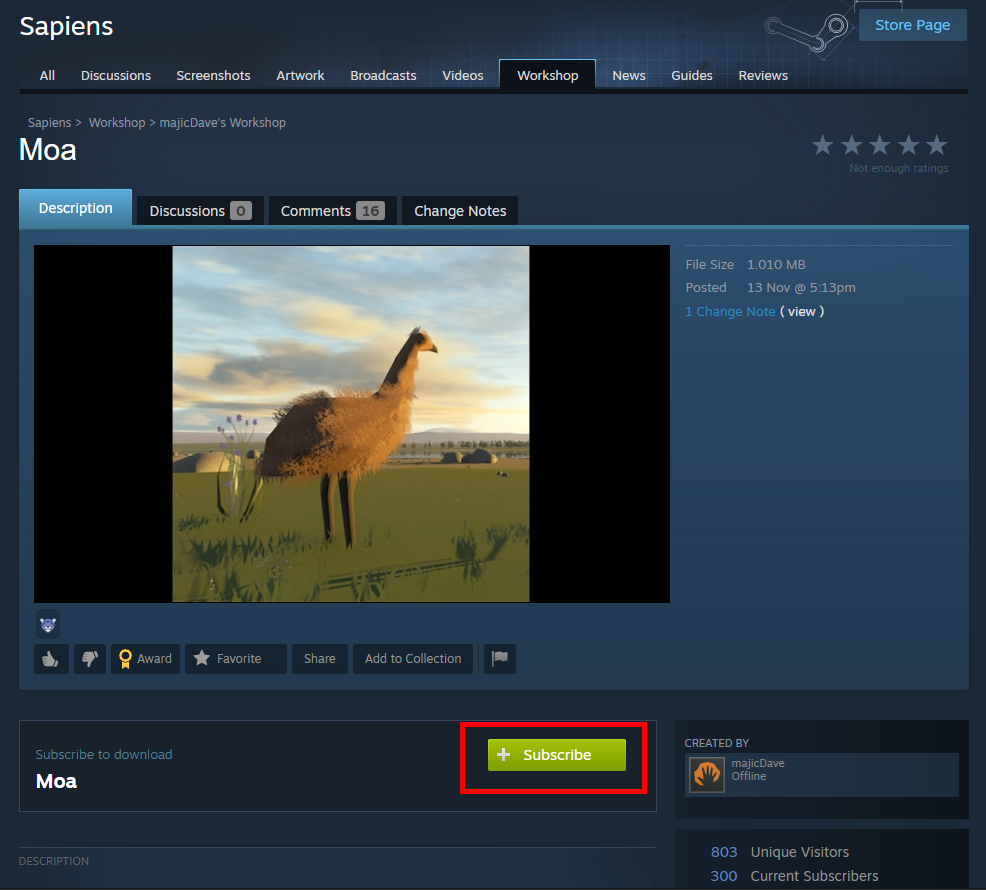
Browse through the available mods and find one you want to install. For the purpose of this walkthrough
we will use the developer's official Moa mod. On the mod's page, select Subscribe (these are free, there is no charge):
You will get a confirmation that you have subscribed to the mod:
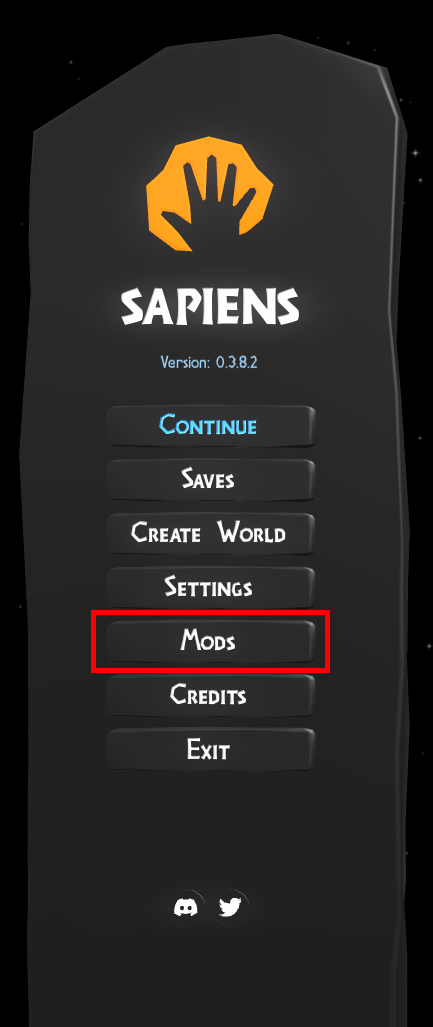
Relaunch the game. Click on the "Mods" button:
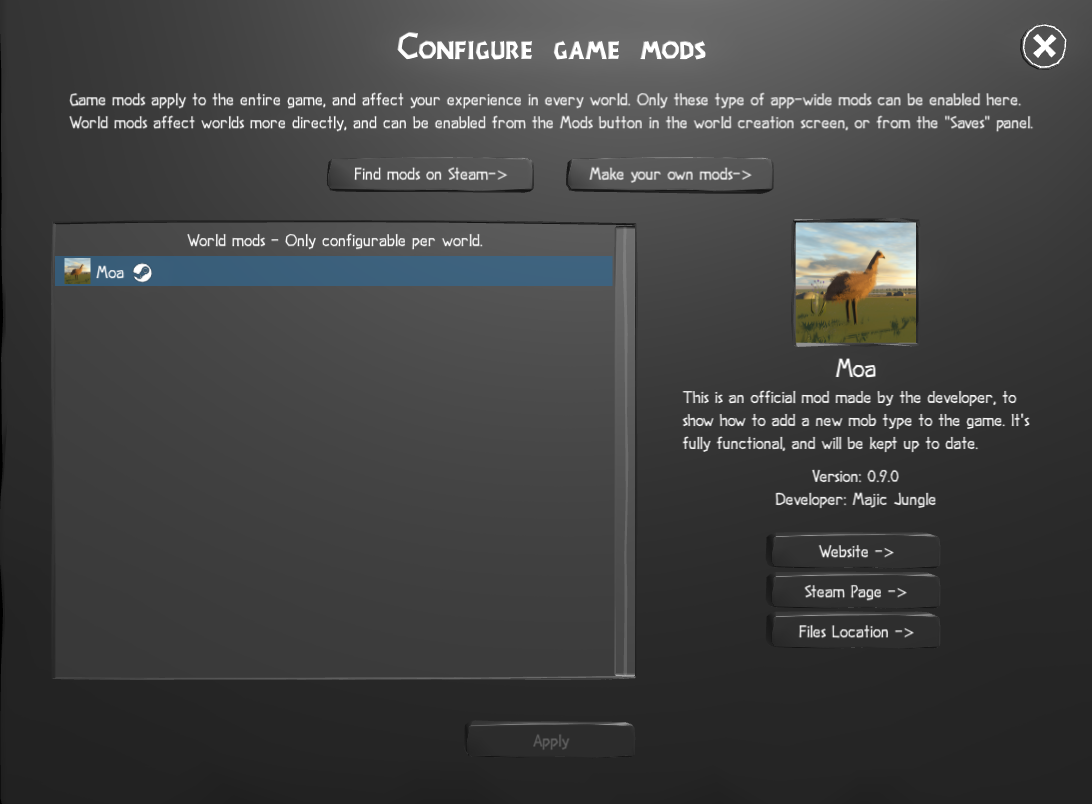
From here you can verify that your mod was installed:
Over on the main menu, click Create World:
Now click "Mods". From here click the checkmark to enable the mod for this new world.
Understand the warning and proceed accordingly:
That's it! Adjust what you want with the rest of the world settings as usual and click Create World. Your world will load up and the mod will be active. It's important to note when enabling new animals you may not see them right away. They will spawn at random just like the original animals - so you may play a while before seeing one. Give it time before thinking the mod isn't working.
Keeping Your Mods Up to Date
Occasionally mod creators will update their mods. While you will receive these updates automatically when you create a new world, mods applied to existing worlds will not update automatically. In this case, please check your worlds periodically (or when a developer has announced that a mod has updated) to see if any updates need to be applied:
